For any home project, be certain to follow local code and permitting requirements.
© 2022 Trex Company, Inc.
01. Intro
02. Safety
03. Remove Lattice
04. Remove Railing
05. Remove Decking and Framing
06. Joist & Ledger Inspection & Removal
07. Deck Site Repair and Preparation

Step-by-Step Instructions
- 01: Deck Demolition an Removal →
- 02: Deck Site Repair and Ledger Preparation →
Chapter 01: Deck Demolition an Removal
Print This Chapter
So you're ready to get started? Watch our how-to tutorial before you start your build.
Before you begin any DIY project, make sure to wear the appropriate personal safety equipment. Eye protection, ear protection, gloves, long pants, a long-sleeved shirt, and reinforced toe shoes are recommended. Always make sure that you have a first aid kit nearby. For any home project, be certain to follow local code and permitting requirements.
Step 1
Assess all areas of the deck before starting demolition. Look for any safety hazards such as electrical lines, broken lumber, beehives or wasp nests, etc.
Address and/or remove the safety hazards before starting demolition on your project.

Step 2
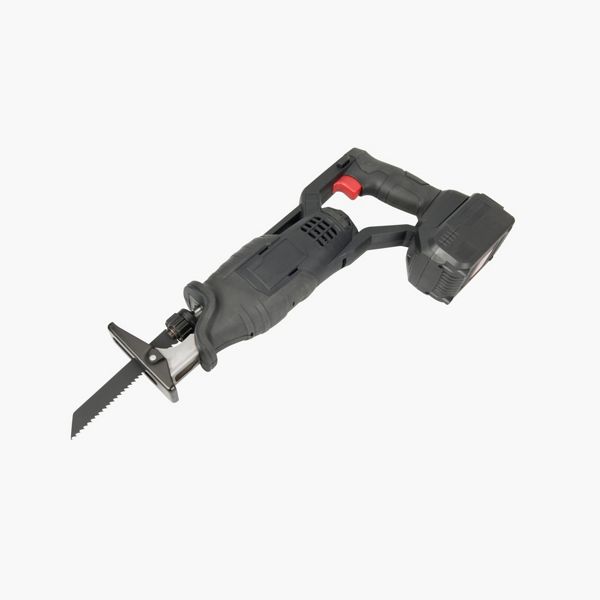
Remove the guardrail of the deck by cutting the top and bottom rails close to the guardrail post using a reciprocating saw.
Start with the bottom rail on both sides and cut the bottom rail completely on each side. Cut far enough away from the post to miss any hardware or brackets.

Step 3
Repeat Step 2 and cut the top rail with the reciprocating saw. Cut each side completely through and far enough away from the guardrail post to miss any hardware or brackets.
Having a second person to hold the rail and prevent it from falling can be helpful. A second person can hold the guardrail and move it off the deck when it is cut. If no help is available, be mindful of the rail to avoid it falling.

Step 4
Once the guardrail has been cut out, take the guardrail section to the trash receptacle on site.
By cutting the guardrail section at the posts in Steps 2 and 3, it can be taken to the trash receptacle in one whole piece, which can make the process quicker and cleaner.
Step 5
Decking can be removed in two different ways. The first way is by removing the fasteners, if possible, and prying the deck boards off the deck frame. This method takes longer, but it may be a more comfortable option if working on a higher deck.

Remember, any remaining nails in the deck boards will need to be bent over using a hammer to avoid harm if they can’t be removed.

The second way to remove decking starts with removing the two boards against the house and the two boards at the edge of the deck. Once these boards are removed, use a circular saw to cut a straight line in between the deck joists. Start at the edge of the deck and cut towards the house.
Step 6
Once the deck boards have been cut between the joists or removed with a pry bar, the joist can be cut. Use a reciprocating saw to cut through the joists near the house and at the edge of the deck. Cut far enough away from the ledger or beam to avoid any hardware that attaches the joist.

Do this in sections so there is always a portion of the deck to safely kneel on when making these cuts. Once most sections have been removed, make the final cuts from the ground outside the deck.

These sections can be taken to the trash receptacle without being broken down further, which makes this an efficient option with considerably less mess.

Step 7
Cut the beams between the support posts using a circular saw. This will give easy access to the joist and decking sections that were cut in previous steps.

Now that the old decking has been removed, it’s time to evaluate the original frame to determine if it can be saved or if you’ll need to build a new one. There are some tell-tale signs that indicate a new frame is needed. One sign can be a cracked joist that has let moisture inside the wood for a lengthy period of time, which will make the joist unstable and prone to failure. Another sign can be rusty hardware and nails. When the hardware and nails rust, they become unstable and prone to failure. If these signs are present, using the existing frame is not an option due to deteriorated conditions. In this case, we will have to remove the framing as well.

Step 8
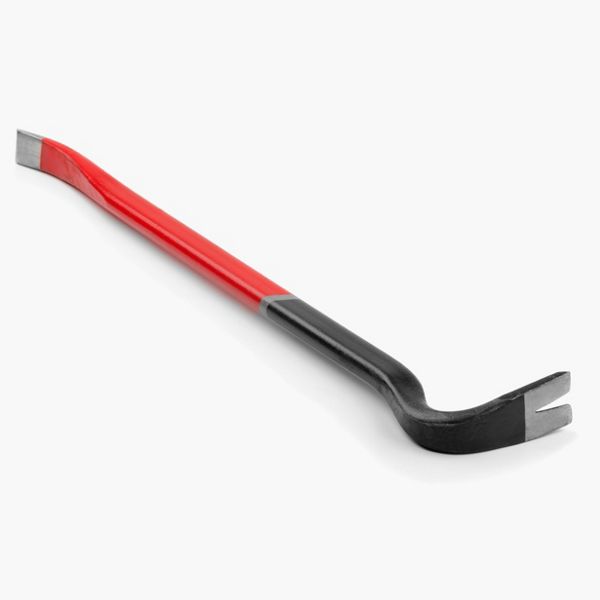
Next, it’s time to remove the ledger board. Start by taking out any lags or bolts. Pry the ledger board off the house slowly, prying a little at a time. This may require multiple pry bars including a larger one. Be patient with this process to keep safe.

Bend any nails sticking out using a hammer so they are flat for your safety, and take the pieces to the trash receptacle.
Step 1
After removing the ledger board from the house, look for signs of water intrusion or water damage. Water intrusion can result in slight discoloration or water stains to the sheathing behind the ledger board. Alternatively, water damage may be present if there is rotted wood, black coloring of the wood, wood falling off the house that is wet, or mold growth on the wood.

Step 2
Remove the siding from the house using a pry bar until clean sheathing is found to expose any places where damage may have occurred. Depending on the amount of damage, this process could require removing a lot of siding but is necessary to correct the problem and ensure that it does not happen again.
In the instance where there is no damage to the sheathing of the house, and no signs of water damage or water intrusion, proceed to Step 4 to install a weather-resistive barrier.
Step 3
If there are signs of water intrusion or damage, remove the water-resistive barrier if the house has any.
If the sheathing shows any signs of water staining or discoloration, contact a licensed professional contractor, structural engineer or building inspector to assess the area in question.

On this project, all rotted or suspect sheathing was removed from the house frame to expose the rim board of the house with a pry bar.

Once the rim board of the house was exposed, it was evaluated for water damage signs such as discoloration, rotting or mold.

The rim board was inspected by poking a screwdriver into it. Where the screwdriver hit a hard surface and did not dig into the lumber, the structure of the rim board was determined to be intact, and we moved on to replacing the sheathing. If the screwdriver digs into the rim board, then the integrity of the rim board could be in question. The screwdriver going into the lumber will be very evident. A hard surface will not let the screwdriver penetrate it. The screwdriver should not be hammered or forced into the lumber. A soft surface will allow the screwdriver to penetrate it easily with little force. At this time, it is advised to call a professional. This rim board is a structural component of the house and could affect many areas of the home if not fixed properly. Replacing the rim board of the house is not included in the deck permit and will need to be verified with your local municipality.
If the rim board is in good condition and is structurally sound, replace all the sheathing that was removed.

Step 4
Once all the sheathing has been replaced, install a weather-resistant barrier on top of the sheathing. This will keep any moisture from getting to the sheathing in the future. This barrier will also be called back flashing when it is behind the ledger board. When installing a water-resist barrier follow the water-resistive barrier manufacturers’ installation instructions.


This content was partially or fully generated by AI and has been reviewed by our team to ensure accuracy and relevance.
(NOT ALL PRODUCTS ARE AVAILABLE IN EVERY COUNTRY.)

Copyright © 2026 Trex Company, Inc. All rights reserved.
Photos and videos © 2026 Warner Bros. Discovery, Inc. or its subsidiaries and affiliates. All trademarks are the property of their respective owners. All rights reserved.
- Country
-
Australia
-
Austria
-
Bahrain
-
Brazil
-
Canada English
-
-
Chile
-
Colombia
-
Costa Rica
-
Cyprus
-
Czech Republic
-
Fiji
-
France
-
Germany
-
India
-
Ireland
-
Israel
-
Kuwait
-
 Lithuania
-
Mexico
-
Netherlands
-
New Zealand
-
Norway
-
Oman
-
Qatar
-
Saudi Arabia
-
South Africa
-
Spain
-
Sweden
-
Switzerland
-
Turkey
-
United Arab Emirates
-
United Kingdom
-
United States
-
Venezuela
By choosing your country, you acknowledge that you have read Trex's Privacy Policy